Showing posts with label pink. Show all posts

Monday, 21 April 2014

NPC Day 7: Drugstore Untried

Hello polish lovers!

Today's prompt in the challenge is using a drugstore untried.  I decided to use three.  I started with a base of 2 coats of Sally Hansen Xtreme Wear Coin Flip, a copper foil finish.


I am trying a new position so that I can show more polish detail.  Also you will notice this is my swatching hand again.  My broken middle finger nail has, although still broken, and held together with Super Glue, grown out enough that I cut down the other nails so they are almost the same length.  That weird bit on the side is the glue holding the split together,  I need to file it down more.

Once Coin Flip had completely dried I got out the Scotch tape and cut triangles to section off the nail.  The triangles that remained I filled with Mint Sorbet, a minty green creme, and Strobe Light, a pink and holographic micro glitter.


Strobe Light is not really showing well, except as the flash of sparkle.  Next time I will definitely use it with a creme to make it stand out more.  I was really impressed with the formulas on all the polishes used.  They were all Sally Hansen Xtreme Wear.  I am usually impressed with the Sally Hansen brand.  I can't believe I left them untried for so long.

That is all for today but I will be back on Wednesday with my Day 8, Boutique Untried...I really shouldn't have any but have more than I thought.

Until then, polish happy!

Saturday, 19 April 2014

NPC Day 4: Frost

Hello polish lovers!

Back with the next challenge of finding a Frost untried in my stash.  I am not a fan of frost finishes as a rule, I tend to find them rather dated.  I did manage to find one in my stash, a Joe Fresh Polish (the brand my local grocery store sells) and besides being a frost finish, the polish is actually called Frost!


Super, super sheer!  This is 3 coats.  Since I hate seeing my own VNL I decided to create a funky french tip using my Art Club by Color Club pastel stripers.  The colours I chose, pink and purple, also happen to have a frost finish.


Sorry it is soo over-exposed but I am not used to having sunlight to take my photos in yet.  Please remember that I am left handed and was using my left hand for this so the lines are not as crisp as they would be if I were painting my right hand.  My poor broken nail on my right hand is getting better, but is not to the length I want yet.

That's all for now,  I will be back soon with my untried Jelly.

Until then, polish happy!


NPC Day 3: Random Untried

Hello polish lovers!

So I am really behind this week on the challenge so I will be posting 3 times today.  First the Random Untried.  I took random to mean a polish that I only had one example of the brand and it is one that I received from a giveaway.  It is even more random in that it does not have a name, although the tag claims it is a limited edition colour.  The brand is Rue Beaute and it came in a skull shaped bottle with a silver cap.

When i took the brush out of this polish I noticed how sheer it was and so started with a base of OPI Alpine Snow.  It took 3 coats of the neon pink polish to get opaque enough that you could not see colour variance streaks.


I can see this working for the LeadLight technique for stamping but it is way too many coats for a base colour for me.  Once this was dry I got out another untried, Kleancolor's Matte Black, for the stamping, using MASH 45(please excuse the mess of my middle finger but matte polish dries very quickly and the entire image did not transfer, so I re-stamped...with not great results).


I think this polish is not going to become a favourite, but I will try it for LeadLight and let you see the results.

Back in a few with Day 4.

Until then, polish happy!

Wednesday, 9 April 2014

NPC Day 2: Pastel

Hello polish lovers!

Today I have my Pastel mani from the Never-ending Pile Challenge.  I was originally going to to a more intricate design with a gradient of three colours and then my stamping with a fourth but I ended up running out of time and did not wait long enough before the sponging and it removed my white base in spots.  There is nothing to do in this situation except start over, and since we were going to see the new Captain America after dinner, I did not have enough time.  So here is my simplified mani using 2 untrieds from the Formula X line.

I started with a base of 2 coats of Unmistakable, a pastel green-blue(looks more green IRL).


This is a very pretty polish and would not be untried except for the fact that the first time I tried the Formula X line the polish began chipping almost immediately so I avoided it.  This time I did not use a base coat and it adhered to my nail much better.  I will have to experiment with my base coats because I hate not using them, that last thing I want is stained nails.

Once this was dry I added my stamping, using another untried, Formula X Brazen, a pastel blue-toned pink.  If I did this again I would use a brighter polish for the stamping because the tones for Unmistakable and Brazen were too similar and the stamping did not show up as clearly as I like.  The plate is MoYou London Pro Collection 02.


You can see a slight difference in colour in the 2 photo's as one was taken using natural light and the second is in my light box.  The first is more colour accurate.


First ever close up, but I wanted you to see the prettiness of the flowers.

That is all for today, but I will be back on Friday...probably late...with the Day 3 prompt of Random Untried...I have no idea what that will be yet.

Until then, polish happy!


Wednesday, 12 March 2014

China Glaze City Flourish and Sea Goddess Collections, First Impressions and Review

Hello polish lovers!

Sorry I have been absent for a while but I think the last challenge had me on posting overload so I took a bit of a vacation when it was over.

Today I have 4 polishes from China Glaze Spring Collection City Flourish and 1 polish from the Sea Goddess Collection.

I will start with the City Flourish collection.


So I finally got around to creating a light box so I am hoping that will help with how uneven my lighting has been.
I purchased these colours when Sally Beauty had China Glaze on their 1 day sale in February, and have used them in mani's since but have not yet told you what I thought of them.

First up is In a Lily Bit.


In a Lily Bit is a lilac cream polish with a strong pink undertone.  The formula is thin but not overly difficult to work with and requiring minimal clean up, the first coat is streaky but is opaque on the second coat.  The polish is one of those neon pastels and does dry matte so it does require top coat.  This is 2 coats topped with Seche Vite.  I normally avoid this shade but the brightness stops the lobster fingers.

Second is What a Pansy.


What a Pansy is definitely my favourite name of the collection, although it is not my favourite polish.  What a Pansy is a mid-tone purple with strong blue under-tone.  The formula is thicker than In a Lily Bit and would be a 1 coat-er if the application was not slightly patchy, fully opaque in 2 coats.  This one does not dry matte and the above picture is 2 coats with no clean up and no top coat.

Third is At Vase Value.


At Vase Value is a light blue that shares its value range with For Audrey, and shows slightly more green IRL.  The 1st coat is streaky but is opaque in 2.  This dries with the same matte finish as In a Lily Bit and this photo is 2 coats with Seche Vite.

Last is Grass is Lime Greener.


Colour-wise, Grass is Lime Greener is my favourite of the collection...but of course it has the worst formula.  It is both patchy and streaky and uneven with 2 fingers requiring a third coat.  It is the most neon pastel of the collection and I do not have anything comparable by other brands.  It dries with the same matte finish and this is 2-3 coats(depending on the finger) topped with Seche Vite.

Next I will show you the 1 polish I purchased from the Sea Goddess Collection: Wish on a Starfish.


Cute name and a very pretty polish.  The Sea Goddess collection is the first China Glaze has released that is all texture containing glitter or shimmer.


Wish on a Starfish is a pink texture polish with a ton of gold shimmer.  This polish has a great formula, in that it stays exactly where you put it and requires no clean up.  Unfortunately it requires 3 coats to be fully opaque and not show VNL.  Drying time is on par with other texture polishes that I own(which I think is way too long and part of the reason I seldom use them).  It would be interesting to put 1 coat over a pink base and top coat, just to see how much the gold shimmer really shows.

Overall I really like the China Glaze polishes for Spring.  The colours are totally appropriate in their Easter Pastels, but bright enough to not look washed out.  I know I will be using them all spring and a few into the summer too.

That's all for today, I will be back probably on Friday for my next post.

Until then, polish happy!

Thursday, 27 February 2014

Nail Art A-Go-Go, Day 25: Watercolours

Hello polish lovers!

Today I have 3 posts for you...then I will be caught up with the Challenge...just in time for it to end.  That's right, tomorrow is the last day of the current challenge so let us begin.

I will start off by saying I made 4 attempts to finish this mani in time for it to be posted on the correct day, the first looked horrible...not even a fail but just ugly.  The second was going ok until I attempted to clean up and destroyed it with an inopportune sneeze.  The third was my fault as I was now frustrated and did not wait long enough before attempting my gradient and ended up removing most of my base coat.  The fourth is the one I will show you, still not 100% happy but at least it is not a fail.

I will not show you the base alone, I have shown it before, Sinful Colors Snow Me White.  Actually one of my favourite whites as it is almost opaque in 1 coat.  I use 2 to ensure no streaks.

Once this was dry(this time) I got out my trusty sponge and some Barry M polishes: Papaya, Grapefruit and Turquoise, and created a gradient.


I was attempting to recreate the look of one of the first techniques they teach you when you are learning how to paint with watercolors and that is to keep a pool of colour on you page and slowly add another colour to create a slow transition.  I have to say, using a sponge is easier(as long as you wait long enough).

Photo taken with flash
Once this was dry I used OPI Matte Top Coat to make it look more like paint and less like polish.  I used white as a base instead of Papaya because I wanted the colour to look slightly translucent, as true watercolor does.  This is also why I used mostly Barry M Gelly's, although Turquoise is not a jelly and it was the most translucent(and also the most difficult to work with).

That is all for this post but I will be back shortly with Graffiti and Pointillism.

Until then, polish happy!


Wednesday, 19 February 2014

Nail Art A-Go-Go, Day 19: Game Night

Hello polish lovers!

Today I have my Game Night nails for you.  So in my house game night is either Scrabble or Trivial Pursuit.  Since we played both of those games on Family Day, they were particularly fresh in my mind.

I chose Trivial Pursuit nails for this prompt.


I chose China Glaze First Mate for my main colour, since it is similar to the background of the game board, and a 1 coater, and I am still in love with it.  My ring finger is 3 coats of China Glaze Oxygen a cream jelly formula.

Once this was dry I added striping tape to create my pie piece shapes and used OPI Pink Friday, Barry M Turquoise, OPI Need Sunglasses?, Orly Prince Charming, Barielle Shades Central Park and Color Club Wham! Pow! to fill in the different categories of questions.  I went with the original colours as apposed to the new ones, the have replaced brown with purple now.


That is all for today but I will be back tomorrow with my Pop Culture nails.

Until then, polish happy!


Tuesday, 18 February 2014

Nail Art A-Go-Go, Day 17: Animation

Hello polish lovers!

Sorry I didn't post yesterday but it was Family Day here in Canada(Ontario to be exact) and we all spent the day together.

So yesterday's prompt was Animation and I took the opportunity to try out some nails that I have been wanting to do since last summer....Adventure Time nails!

They definitely did not turn out the way I wanted them to but I don't think they were that bad for a first attempt.  They all started of a base of OPI Alpine SNow.


I think LSP turned out the best but I will list the polishes that I used here for you:
LSP-OPI A Grape Fit!, and Need Sunglasses with a black striper.
Finn-OPI My Vampire is Buff and a black striper.
Jake-OPI The "IT" Color and black and white stripers.
Princess Bubblegum-Color Club Flamingo, China Glaze In a Lily Bit and the Grass is Lime Greener, OPI Need Sunglasses and a black striper.

That is all for now but I will be right back with my Sci-Fi nails.

Until then, polish happy!


Friday, 14 February 2014

Nail Art A-Go-Go, Day 14: Sweets

Hello polish lovers!  Happy Valentine's Day!

Today marks the half way point in this challenge, Yay!

Today's prompt is Sweets, very appropriate for the date.  So I decided to create Valentine Message nails.


Dreaded thumb shot.  So from pinkie down through the nails the colours used are: Barielle Shades Joytini, LimeCrime Once in a Blue Mousse, Orly Mint Mojito, OPI Pink Friday, and LimeCrime Crema de Lemon.  This is 2 coats of each polish except for Joytini, which needed 3.

Once this dried, I again reached for the Revlon Parfumarie in Bordeaux(so good for Valentine's stamping) and BM425 for my text.


Even though these are pretty simple, I received numerous compliments on these nails while I was at work.  Sometimes simple is good.

That is all for today but I will be back tomorrow with my next prompt, Round and Square.

Until then, polish happy!

Thursday, 13 February 2014

Nail Art A-Go-Go, Day 13: Hearts

Hello polish lovers!

Today, the day before Valentine, our prompt calls for Hearts.  Tres Appropriate!

I began with 2 coats of OPI Pink Friday, a lovely light blue toned pink.


Once this was dry I got out my stamping plates and Revlon Perfumerie in Bordeaux(stamps awesomely).  I used a different image on each finger from Pueen 29 and 41, with an accent in Wet n'Wild Ebony Hates Chris(should have used Konad to make it more opaque).


I think my favourite image is the overlapping hearts, they are just so cute.

Anyway, that is all for today but I will be back tomorrow with my Sweets nails for a special Valentine's Day mani.

Until then, polish happy!

Saturday, 8 February 2014

Nail Art A-Go-Go, Day 8: Still Life

Hello polish lovers!

I told you I would be back!  So lets get started...I began with 2 coats of China Glaze Lemon Fizz, a soft butter-cream yellow(I have a few by different brands that look to be similar colours if anyone would like a comparison).


Once this was dry I got out my trusting dotting tools and a detail brush and got started.


The vase is Color Club Pucci-licious, the stripe is Color Club Silver Lake, the leaves are Orly Mint Mojito(light green) and OPI Jade is the New Black(dark green) and the roses are Barielle Shades Euphoric(lighter raspberry) and OPI Visions of Love.

I was kind of going for a Van Gogh look for the vase of flowers but its hard to make nail polish look like brushstroke-y oil paint.  I really love how the full roses look, better than the buds in the vase.  The last time I did roses I used a small dotting tool and dabbed in C's while this time I put a dot of the dark colour in the center of the wet polish and used my thinnest dotting tool to swirl the two colours around.


The roses are my favourite freehand that I have done recently, and I cannot wait to show you my mani for Camoflage...but that is later in the week.

I will be back tomorrow with my Inner Geek nails...I will give you a hint...EXTERMINATE!!!

Until then, polish happy!


Thursday, 6 February 2014

Nail Art A-Go-Go, Day 6: Neon

Hello polish lovers!

Today I have my mani for the challenge prompt Neon.  I love neon! Especially for summer, my toes, and usually fingers are dowsed in neon from June till September.  I am always looking for another good neon to add to my collection.

I am showcasing 2 of my newer neon's today.  I started with a base of Orly Glowstick, your quintessential highlighter yellow.


This has been colour corrected because my camera took one look, said AHHH!!! and ran in the other direction, like a little baby, from the neon awesomeness.  This very close to real life though.  I love the Orly neon colours, I have Melt Your Popsicle as well, awesome traffic cone orange! This is 2 coats over a base of 1 coat of OPI Alpine Snow.

Once this was dry I got out my dotting tool and used Alpine Snow, again as a base, dotting randomly across my nails.  When this dried I went over the dots with Models Own Bubblegum.  I have found with neon, if you don't use white base the colour below will leech and change the colour you are placing over your base.


 This is still looking slightly orange, again my camera's fault, cannot handle the neon.

That is all for today, but I will be back tomorrow with the Day 7 prompt of Primary.

Until then, polish happy!


Friday, 31 January 2014

Still Obsessed with MoYou London Plates

Hello polish lovers!

So I have still not decided on a set schedule for this blog, which is why I have not posted in a while(that's a lie, I have been feeling really lazy lately and although I have been doing my nails and taking photo's, I just haven't wanted to edit).  Starting tomorrow, though, I have decided to do the Nail Art A Go-Go Challenge for February.  It is a 28 day challenge so I will have a new mani everyday for the month of February.  I have completed the first week of prompts and will continue to try to work ahead.  I love the idea of this challenge because it is a lot of Art related prompts, and as a former Art major, I find this irresistible.

Anyway, on to today's mani.

For my base I started with Models Own Bubblegum(still obsessed with a neon that stamps beautifully).


Bubblegum is completely opaque in 2 coats and does not require a white base.  It is much more neon in person, don't know why it is so toned down in my photos except for the inability of my camera to accurately capture most neons.

Over this I decided to stamp with another of the MoYou London Pro plates, 15. which is Pop Art-y, with Warhol and Lichtenstein, which I love.


I, again, used Color Club's Abyss for stamping.  Putting the green polish over the pink, caused the colour to look more blue, but I am okay with that.  I decided on the Warhol Mickey Mouse image for my accent finger.

Something else that I have been working on is going through all my polishes to see which ones are good for stamping, over both white and black.  I have completed the polishes in my Melmer and will begin on my rack polishes soon.  Once I am finished I will list on my blog all of the polishes that stamp over light and dark polishes.

I will be back tomorrow with the first prompt for the Nail Art A-Go-Go Challenge, achromatic nails.

Until then, polish happy!

Saturday, 18 January 2014

Nail of the Day: Alpine Snow with MoYou London Stamping

Hello polish lovers!

Today I am back with my nail of the day...although it is one I wore a few days ago but I am trying to get my photo's built back up so I have changed my nails 3 times since I got back from vacation.

Having just come back from the Caribbean, I was feeling bright and floral, so that is what I did.  I started with 2 coats of OPI's Alpine Snow, one of my favourite whites...I need to get a backup bottle badly, fortunately I think it is part of the permanent collection.  I especially love when I use it for a stamping base and have a tan, it looks very good...more of a tan than I have now, obviously.


Once this was coated in SV and dried I chose the colours I wanted to stamp with.  I used Models Own Bubblegum, a neon pink that I discovered, through The Crumpet, stamps beautifully...I definitely need to get more of their neons.  I used my MoYou London Pro Collection 10 and the cherry blossom design for all fingers except my ring finger, which I stamped in Color Club Abyss and a different floral design from the same plate.


I love the contrast between the 2 colours, while the floral designs and the white base help to keep the design cohesive.  I actually loved the pink and green together so much, I used them for the next nails that I did as well(post coming soon).


While at my local Walmart today I found some of the new Sally Hansen Satin Glam polishes...mine had 4 colours, and picked up Silk Onyx, so look forward to a first impressions and review of the newest Sally Hansen line, coming soon.

Until then, polish happy!

Tuesday, 14 January 2014

Vacation Haul...As Promised

Hello polish lovers!

Here is my vacation polish haul, as promised.  It is not near as large as I was expecting it to be but the polishes at TJMax and Marshalls in Ft. Lauderdale were incredibly picked over and I didn't find anything that I wanted, except a Sparitual mini 10 pack at Marshalls, unfortunately, the line up was so long I did not feel the wait justified the purchase.

I did go into Bed, Bath & Beyond and managed to find 2 polishes.  The first was Sinful Colors, Nail Junkie, a lovely teal jelly filled with small holographic hex glitters, that is opaque in 3 coats.


The second polish I picked up at Bed, Bath & Beyond was Color Club's Abyss, a a bright green-blue that works very well with Nail Junkie for an accent.  Abyss is very opaque, requiring only 1 coat, and I am happy to announce works great as a stamping polish (I currently have it on my accent finger).


The other 4 polishes that I picked up were all purchased in St. Thomas while on my cruise and they are from Del Sol, which is a shop that deals with items that change colour in the sun, with the polish being no exception.  Unfortunately the Canadian winter sun that shone today was not strong enough to show the colour shift so I can only show you the non-changed colours and tell you what they change to.  I think we will have to wait till summer for a full transformation.


Confetti, a violet base with holographic glitters, turns dark blue in bright sun.


VIP, silver/gold champagne base with holographic glitter, turns bright pink/red, depending on how many coats you use.  I had this on for half of the cruise and could not stop looking at how shiny my nails looked.  When I wear this again I may use a nude base colour because with 3 coats you still have visible nail line.


Heartbreaker, red jelly base with red and silver small glitter, turns purple in the sun.


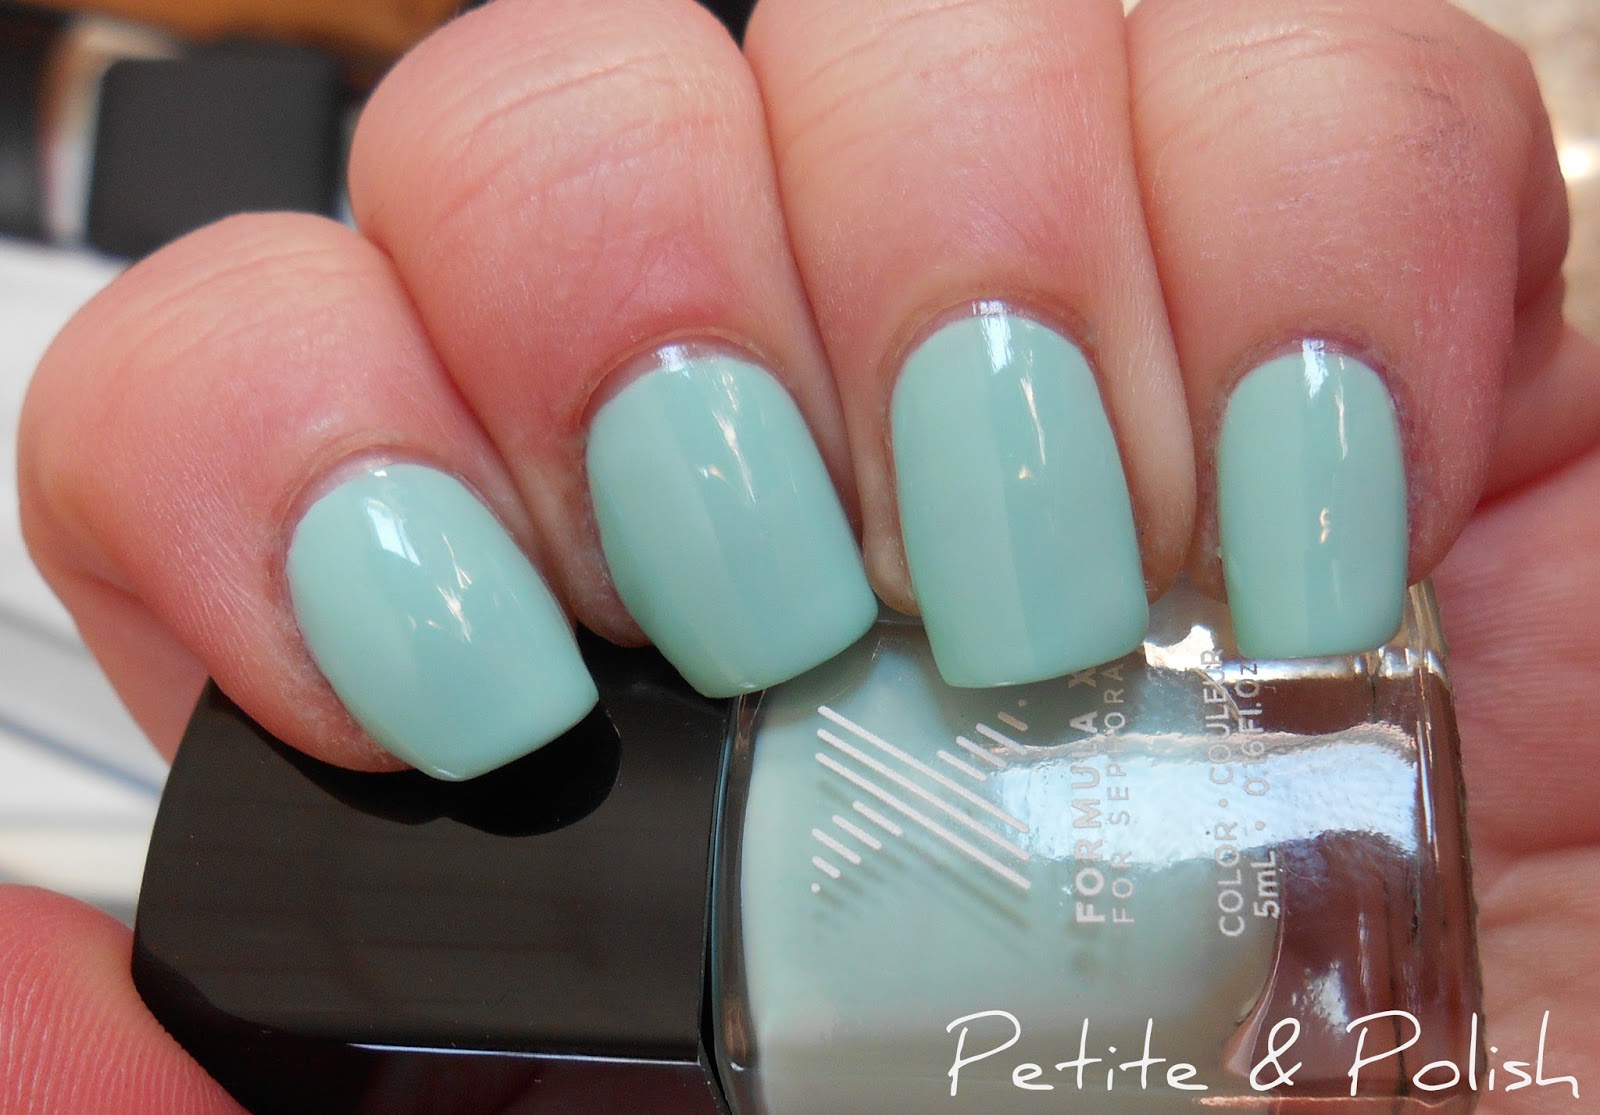
Electrick!, the only non glitter that I picked up, is a shimmery ice blue that changes to an intense lime green in the sun. I don't know how opaque this is but I will definitely be wearing it on my toes a lot this summer.

That is the end of my haul, I know it is kind of small but I didn't want to buy something just because it was there, I did not want something that I already had by another brand, I wanted colours that added to my collection.

I did receive the 22 mini's from the Formula X for Sephora from my brother this Christmas, as I mentioned in an earlier post, I also received 3 SOPI's from my sister, Thyme for a Mani, a brown-y taupe creme that reminds me of a lighter version of You Don't Know Jacques(I saw it at Winners one day and am kicking myself that I did not pick it up).  I Think I Cayenne, a burnt orange shimmer, and BYOBOY, which is a dusty rose creme that I will definitely be using for retro roses this spring.

Anyway, that is all for this post.  I will be back soon.  I need to get back into a regular posting schedule.

Until next time, polish happy!

Monday, 18 November 2013

33DC Day 25: A New Technique for Me

Hello polish lovers!

Today I have my new technique mani for you.  It was really difficult to decide on a technique I had not done before...not because I have done them all(Goodness knows I am not even close)  but because most of the techniques I have not tried are because of how messy they are.  This really causes my OCD to come out and there is nothing worse than trying to clean polish out from your cuticles for half an hour for clean up.  This problem means that I was not yet willing to try water marble or splatter nails.  I have enough problems with the clean up for stamping and gradients.

Because of this problem I wanted to choose a technique that I had not done that required very little clean up, and so I chose the Saran Wrap technique.

For my base colour I decided on yet another of the Color Clubs from the unnamed sets.  This one is a bright, almost neon peach that I think is East Austin, based on swatches.


Sorry for how dark the colour is but there was NO SUN that day...I may as well have been living in a cave.  This is 2 easy coats of East Austin, perfectly opaque and basically no clean up required.

Once this was dry I added a light coat of my second colour, another unnamed Color Club that I think is All That Razz, and quickly balled up Saran Wrap to remove the colour and create a stone effect(if stones were bright peach and pink).


I don't know if I removed quite enough of All That Razz but I quite liked the effect, especially on my pinkie and ring nails.


I think this technique would make a great base for stamping, so look forward to something like that in the near future.

That is all for today but I will be back on Wednesday with my next 33DC mani Inspired by Instagram.

Until then, polish happy!

Monday, 11 November 2013

33DC Day 22: 3 Colour Gradient with a Pattern

Hello polish lovers!

I am hoping to have better luck with this post than the last.  My computer was doing strange things to the photos.

So I have my 33DC mani for day 22 for you today.  This was a great theme because it was so open.  All I had to do was choose 3 colours, create a gradient and then create a pattern over top.  I gathered 6 colours together and made my brother choose three.  They were all Color Club polishes and he chose All That Razz, New Bohemian and a chartreuse green that I could not find a name for.  All of these polishes came from random sets that I purchased at Winners, they are full sized bottles but none are named(I had to search the internet for the other colour names), for some reason I cannot find this chartreuse, it is not the same as Sunrise Canyon, although it is the closest of the other Color Club greens.  If anyone knows the name of this polish, please feel free to leave a comment.


This is 2 coats and it is very similar in colour to OPI's Did It On 'Em, but the formula is much better, Did It On 'Em never wanted to go opaque, even with white base coat.

Once this had dried I created the gradient pattern with the 3 colours.


It looks rather rainbow-ish but I love how bright it is.  Once that had dried my brother stated it needed harsh lines in black to finish.  So I looked through my plates and got out GA15 with Konad Black stamping polish.


I, surprisingly, really liked how this turned out and can totally see myself wearing this during the summer.  There is something very 80s about this.

That is all for today, until next time, polish happy!


Monday, 4 November 2013

33DC Day 19: Following Someone's Tutorial

Hello polish lovers!

I finally gave in after a moderately bad break on my middle finger nail and cut all my nails down to about half of their original length:(  So there will only be a few more posts at my old length before the new shorter nails will make an appearance.

So for today's challenge I decided to follow The Nailasaurus's Nimbus Nails tutorial, found here.  For this mani I decided that rather than to use a white base, I would take the opportunity to use a new polish that I had not chance to try, OPI's Pink Friday.


Pink Friday is a light bubblegum pink with a slight blue undertone, which works better for me than more orange tone pinks which make my skin tone look sallow.

I followed The Nailasaurus's tutorial and began with my darkest colour, OPI's Vant to Bite My Neck?, a dark eggplant.  Then OPI's A Grape Fit!, a medium purple.  Followed by China Glaze's Purple Panic, Color Club's Warhol, and finished with China Glaze's Innocence.  I found that my nimbus spots were a little too intense so I put a coat of Innocence over the entire nail.  I think I need more practice but I like the idea of these nails.


I think I need to work on overlapping the halos more, I think next time I will use greens and blues.  That is all for today but I will be back on Wednesday for my double up day.

Until then, polish happy!


Thursday, 24 October 2013

Hallow e'en Challenge: Zombies

Hello polish lovers!

Today I have my Zombie mani for the Hallow e'en Challenge.  I struggled with an idea for this one for a bit.  Zombies are rather difficult to draw and none of my stamping plates were appropriate.

I started with a base of 2 coats of OPI's Don't Talk Bach to Me, this is an interesting colour, a yellow-y green with a slight shimmer.  I like it more than I thought I would.


My ring finger is 3 coats of China Glaze's Innocence with random splotches of Ciate's Cream Soda, outlined with a black striper.  I was trying to make it look like brains but I don't know if I managed it.

On the tips of my other fingers I put 1 coat of OPI's Did it On 'Em, this works much better over Don't Talk Bach to Me than white for a base coat.  I went over the edge between the two colours with a striper and made them look like stitches.


This picture is more colour accurate.


And Matte, because you know, I am addicted.  Although I think the brains look better glossy.

That is all for today but I will be back tomorrow with my 33DC for the theme Animals, I really liked these so I hope you do too.

Until then, polish happy!