Showing posts with label teal. Show all posts

Monday, 2 June 2014

First Emily de Molly Stamping...Lead Light Technique

Hello polish lovers!

I know, I know...bad blogger.  I have been doing my nails and taking photos but not editing or posting.  I am going to try to get back into the swing of things.  I really need to find some of the new polish that has been released for summer.  I didn't find many of the spring polishes spoke to me or were anything new.

Today I have a mani that I did a few weeks ago when I got my Emily de Molly plates from MessyMansion.  I am addicted!  I have 4 of the 5 available and I love them all.  This was plate EDM03.

I started with 2 coats of OPI My Boyfriend Scales Walls, which I will not show because I know I have posted about it before.  It is my favourite white, kind of dirty and gray for when you don't want it to be too bright.

I used Mundo de Unas black stamping polish...by the way I am loving all the stamping polishes of hers that I have tried so far...except peach...but that is for another post.

Once I stamped my image I used Sinful Colors GoGo Girl, China Glaze Keepin' it Teal, China Glaze Ride the Waves and OPI Need Sunglasses and a small dotting tool to fill in random spaces.


I have done a few more using this technique since then that I really enjoy as well.  I love the Frank Lloyd Wright-ness of this plate.  All the images are crisp and transfer perfectly from the stamper to the nail.

That is all for today, until next time, polish happy!

Saturday, 19 April 2014

NPC Day 5: Jelly

Hello polish lovers!

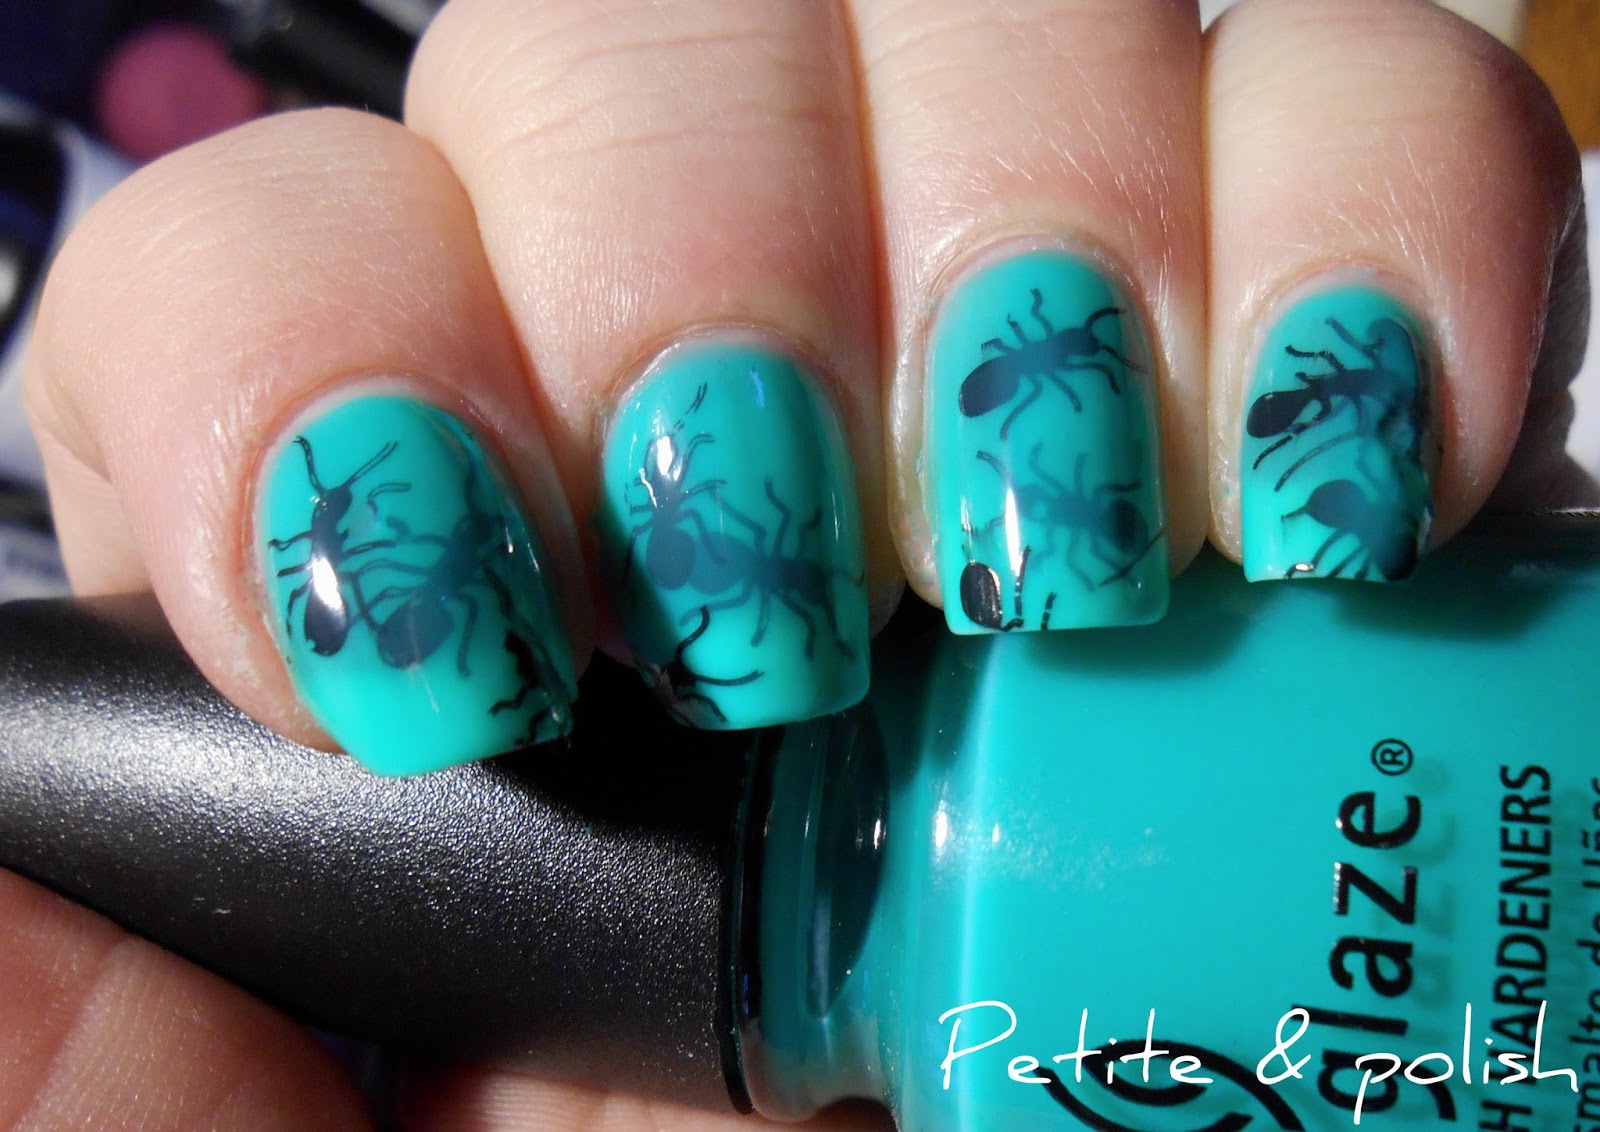
This is going to be a quick one.  Day 5 Prompt is Jelly and I chose to do a pond mani using China Glaze Keepin' it Teal.  This is a very sheer teal green that is another in my collection that I will have to try with LeadLighting.


I used the ant image from Pueen 45 and Kleancolor Matte Black and layered and repeated the image at different angles, layered with coats of Keepin' it Teal.  I don't know if it was a total success but I don't mind the finished product.  This is 5 coats total and you still have slight VNL so that will tell you how sheer it is.

That is all for now.

Until next time, polish happy!


Monday, 24 February 2014

Nail Art A-Go-Go, Day 24: Abstract

Hello polish lovers!  Long time no post;p

Today's prompt was Abstact, and I used this as an excuse to do one of my favourite types of nail art, gradients.  I worn you, I decided to include a pic of what this gradient looked like before clean up!  So messy!  This was inspired by 2 of my favourite Abstract artists, Rothko(who did colour fields), and Bridget Riley(who did, I want to call it, optical illusion paintings).

I created a gradient using all OPI colours, Greenwich Village, Jade is the New Black and Ski Teal We Drop....here comes the mess...


I used a new type of makeup sponge for this, I usually use the really cheap Walmart ones but I bought these on clearance at Winners and they have a much finer texture and create a smoother gradient.  I use a Q-Tip and acetone to do the big clean and then finish with a small brush and more acetone.


Once this was coated in Seche Vite and completely dry I got out my MoYou London Sailor Collection 06 plate and Essie No Place Like Chrome to do some stamping.


I almost like it more before I did the stamping...I need to learn that sometimes less is more...only very occasionally, but this appears to be one of them.

That is all for today but I will be back tomorrow with the next prompt of Watercolour.

Until then, polish happy!


Wednesday, 20 November 2013

33DC Day 26: Inspired by Pinterest and Falling for Nail Art Challenge: Jewel Tones

Hello polish lovers!

Its strange that I did not work today and yet I am still doing this post so late in the evening.  I guess that is what happens when you use your days off to complete all of the nail challenges that I had left to do.

I am doing this as a double post because it is almost time for me to go to bed and it is easier for me to combine these 2 challenge posts than to separate them.

So first of my Inspired by Pinterest mani.  I was inspired by Lucy's Stash tutorial on basket weave freehand patterns, seen here.

I started off with a base of 2 coats of another unnamed  Color Club, a colour that was close to the inspiration colour, a greyed out purple(although the CC is more greyed out than purple), that, based on swatches I have decided is Shabby Drab.


This was actually very flattering on the nails and a gorgeous grey/purple creme.

Once this was dry I followed the tutorial and used Wet n' Wild's Ebony Hates Chris and a detail brush to create the design on my index finger.  I wasn't really impressed with the lack of control I had with the brush so when I moved on to the ring finger I decided to use a black striper instead.  I feel that worked much better for how clean I wanted the lines to be.


On my index finger you can't even tell what the pattern is supposed to be, but it is much clearer on my ring finger.  I will have to remember that I really have much more control over the brush if I use as striper rather than a detail brush.

I used a silver square stud from the Born Pretty Store and another unknown Color Club on my middle nail.

Now on to the Falling for Nail Art post for the theme Jewel Tones.

I started out with a base of 2 coats of Color Club's Editorial, a colour that appears to be a dupe of Chanel's Peridot(which I do not own, and therefore cannot do a comparison on), a green to gold duochrome, which my camera would not capture in any in focus shots.


Once this dried I used China Glaze's Tongue & Chic, a dark teal, and Bundle Monster BM422 to create a diamond pattern.


Please ignore the black smudge on my ring finger, I wanted to do a larger black diamond on its own but the stamp did not co-operate.

Anyway, this is the end of my double post for today but I will be back on Friday with my next 33DC mani.

Until then, polish happy!


Thursday, 26 September 2013

The Crumpet's 33DC Day 3 Tape Mani

Hello polish lovers!

Today is day 3 of the 33 Day Challenge I am working on.  By the way, things are about to get Crazy because starting October 1 I will be participating in the Hallow e'en challenge that was posted on Crumpet's Nail Tarts and here is the run down:

Mon 01/10 - Trick or Treats (candy corn etc)
Thurs 04/10 - Black Cats
Tues 09/10 - Zombies
Thurs 11/10 - Witches
Tues 16/10 - Freestyle Halloween
Thurs 18/10 - Things That Go Bump In The Night (Monsters Etc)
Tues 23/10 - Pumpkins
Thurs 25/10 - Blood/Gore/Splatter
Sat 27/10 - Influenced by Scary Movie
Wed 31/10 Recreate your fave mani (your own or someone else's)

I am super excited for this because I love Hallow e'en, I mean really love Hallow e'en, the costumes, the candy and most especially watching Rocky Horror Picture Show and Hocus Pocus(Opposite ends of the spectrum but I love them both).

Anyway, on to today's mani and the theme of using tape to create your designs. I will say that I have never used tape before, I have always used stripers but it was a chance for me to go outside my polish box and try something new. It also gave me an excuse to open the striping tape I got in a giveaway from My Boyfriend Hates Makeup.

3 coats OPI's Kyoto Pearls
I started with a base coat of OPI's Kyoto Pearls, which is a sheer pearl-ized white that required 3 coats and still had a slight visible nail line. I liked the polish but it is not a great formula, too sheer and yet very brush stroke heavy, no matter how careful I was. I let that dry then added my striping tape in a variety of interesting Art Deco designs(however I don't think I let it dry enough because I ran into a bit of trouble when I pulled off the tape after applying my secondary colour).

Tape Design and China Glaze Tongue & Chic
I painted over my tape using China Glaze Tongue & Chic from their fall collection(the only colour I have so far but I love it!). Tongue & Chic is a dark teal polish that is perfect for fall and opaque in 2 coats. Unlike the polish, I do not love my finished result, I think the next time I do this I will use my Seche Vite and a more opaque colour to aid in drying time and wait longer before I apply the tape.

That's all for today! I will be back on Sunday with my next Falling For Nail Art Challenge mani, the theme is Crunchy Leaves. Until then, polish happy!